Lesson 2
Your First Git Project
Create a GitHub account and turn your first GameMaker project into a Git repository with GitHub Desktop.
Git, GitHub and GitHub Desktop
First, let’s make it clear what we are working with. There are really three main “systems” we’ll be dealing with.
Git
Git is the version control software itself. It watches the files in your project folder and lets you save checkpoints (called “commits”) whenever you decide your current changes are worth recording. Git is often used through the CLI, or command line interface, but we won’t be interacting with the command line in this course. We’ll be using the simpler GitHub Desktop app instead.
GitHub
GitHub is an online hosting service for Git repositories. It has free accounts (and paid ones, but we don’t need those), and it allows you to store your version history online in a safe manner (obviously, all backup methods have failure points, but this is going to be the strongest method available without jumping through some crazy hoops).
GitHub Desktop
GitHub Desktop is the front-facing software we are going to use. It hooks into Git and allows you to control it through a pleasant GUI, rather than the command line. It gives you access to all the common Git functions you’ll generally want for the majority of your Git work.
A repository, or repo, is a Git-tracked version of your project folder. It’s the record of all the changes you have decided to save with Git. For this course, you can really think of it as “your GameMaker project with Git memory attached.”
Let’s git ‘er done!
Hopefully you’ve completed the “Let’s Make Click the Clown” course immediately prior to this one. We’ll be working with that. If you haven’t, you can pick a random GameMaker project that you have (or create a new one).
First up, you’ll want to create a GitHub account. Go to https://www.github.com and click “Sign Up” wherever it is on the site (top-right corner for me). You can choose to use your existing Google or Apple accounts, or create an account through your own email (it doesn’t matter which you choose).
Then log in.
Don’t worry about the GitHub dashboard right now, it can be a little bit dense and confusing and you won’t be interacting with it much for this course.
After you’re logged in, you’ll want to get the GitHub Desktop program. You can find it here: https://desktop.github.com/download/. Download it and install it.
Open GitHub Desktop. You might be prompted to sign in, and if so, you should do so. It’ll open a GitHub webpage and ask you to authorise GitHub Desktop to access your github data. Click Authorize desktop to let it. GitHub Desktop obviously needs access to your GitHub to allow it to manage your repositories.
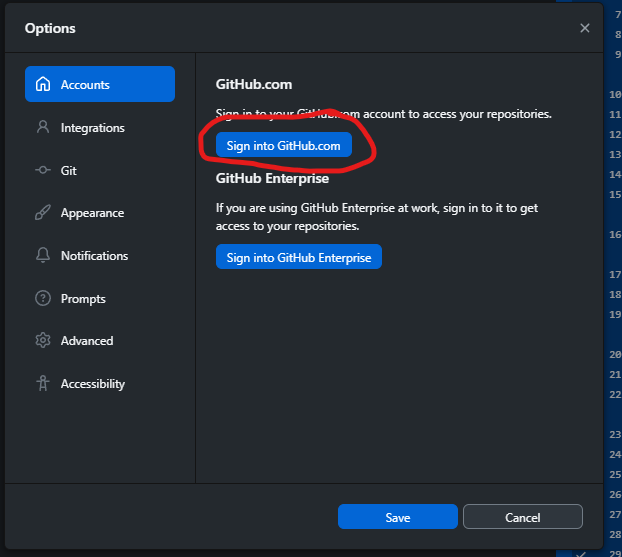
If GitHub Desktop didn’t try to sign you in automatically, you can find the sign in under File > Options > Accounts > Sign into GitHub.com.
Ok, we’ve now got enough setup done to begin using Git with our projects.
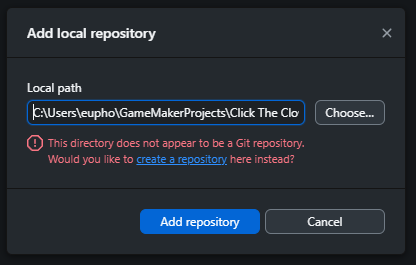
To get a Git repository built for our project (Click the Clown in this example), we want to click File > Add local repository. This will pop up with a little window called “Add local repository”, and a local path.
Click Choose and find your project folder. This is wherever you set up your project in GameMaker
(most likely a folder in C:\Users\your_username\GameMakerProjects if you didn’t save it to a new place).
Find your project folder in there, and double click on it to open it. It should be the folder that has the
Click The Clown.yyp file in it (or whatever you named your project). This is the folder we want to use,
the one that has the .yyp file of the project we are interested in (if you are unsure, open the folder
in Explorer and check to see if it has the correct file).
Click Select Folder and then click Add repository.
Because this GameMaker project is not already a Git repository, GitHub Desktop should warn you that the directory does not appear to be a Git repository.
Don’t stress. This is what we expect. It just means GitHub Desktop has found a normal project folder, not a Git-tracked project folder yet.
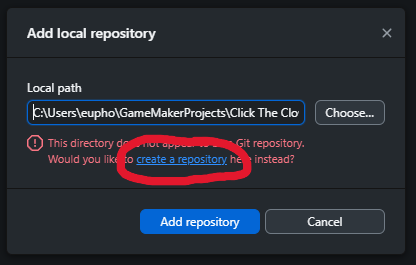
Click the little “create a repository” text.
That will then pop up with the “Create a new repository” window.
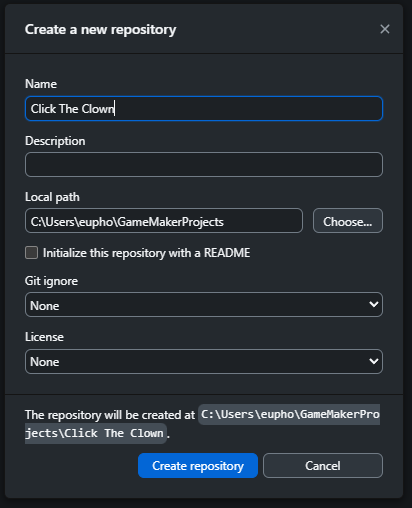
You can fill in a description if you like, and the rest of the options don’t matter, so then we click Create Repository.
GitHub Desktop will take a few moments to initialise the Git repository and then we’re good.
We could also create a new repository by clicking File > New repository but I always find this method a bit more fiddly and easy to mess up (accidentally creating the repository in the wrong place). We wouldn’t select the actual GameMaker project folder, instead we’d have to select the parent folder it lives in and then manually name the new repository exactly the same as the project folder. As I said, easier to mess up, so in my opinion (and my actual practices) I always go through the Add local repository method I outlined above.
At this point, we have GitHub Desktop completely set up and ready to deal with our changes locally! The hard part is done. Since we’ve now got our accounts setup, and GitHub Desktop at the ready, any future projects we want to track with Git becomes a simple case of following the steps from Add local repository onwards.
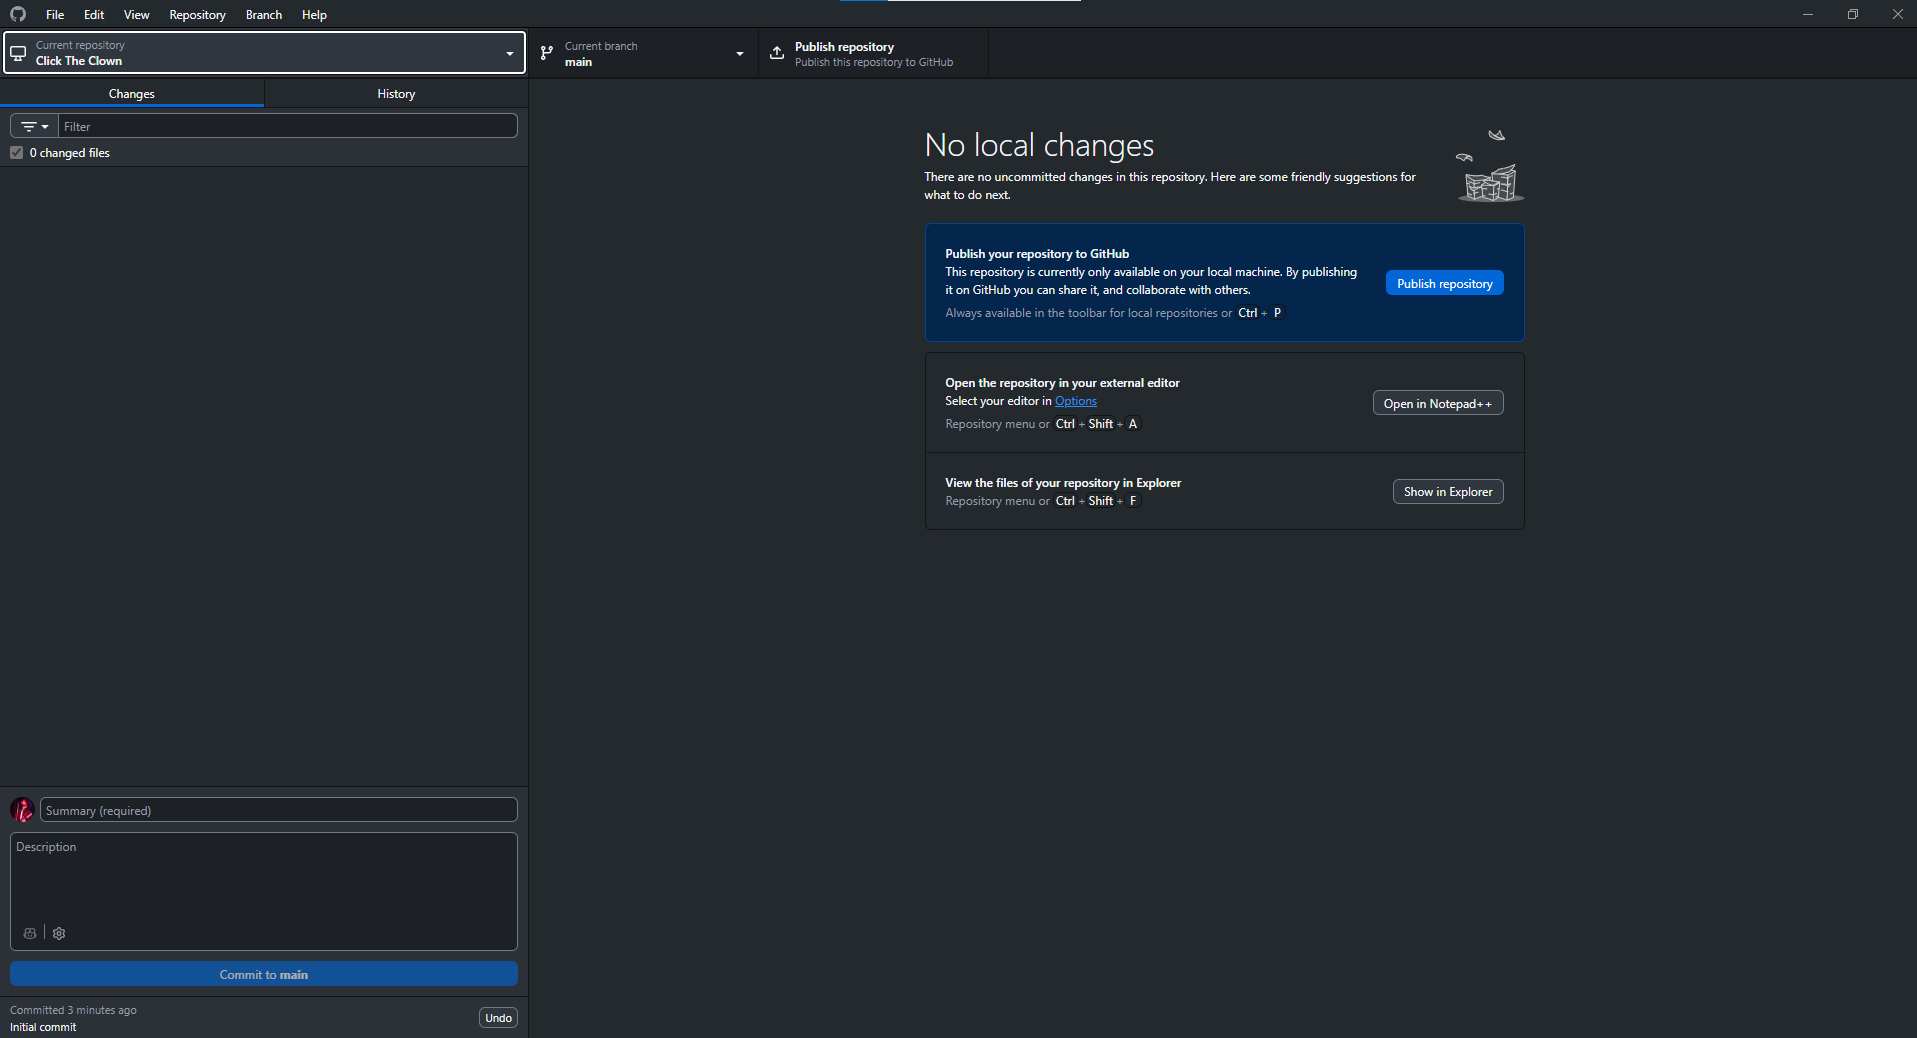
GitHub Desktop already automatically created an initial Git checkpoint of your project, and since we haven’t changed anything since, there’s nothing interesting to review in GitHub Desktop yet. In the next lesson, we’ll make an actual change to the project and use GitHub Desktop to save that change locally!