Lesson 5
Undoing Mistakes
Learn how you can use version control to revert mistakes that have been made.
So you deleted an object
GM can be pretty harsh with saves. It doesn’t attempt to version saves. Every time you run your project, the current state of it gets saved. It doesn’t have rolling auto-saved versions of the last few hours of work or anything.
So it can be pretty easy to alter something in your project, whether intentionally, by accident or even outside your control (hello projects saved to a cloud-enabled folder or removable media, hope you like that data loss!) and then suddenly realise what a grave mistake you’ve made, with often no ability to fix it.
Git, on the other hand, gives you this ability.
Git gives us a few ways to undo mistakes.
If we have some changed files waiting to be committed, we can simply discard them.
If we’ve already committed a mistake, we can “revert” that commit. “Revert” is Git-speak for “create a
new commit without the changes saved in the reverted commit present”.
Let’s give it a try.
Obviously, make sure you’ve followed all the previous lessons before you do this, hahaha.
Open up our Click the Clown project in GM. In the Asset Browser, find our obj_clown object and right-click
it. Select Delete.
GM will pop up with a warning asking if you’re sure. Click ok. Then press Ctrl+S to save the project.
Now, we cannot undo this with Ctrl+Z. The object is properly gone from the folder. You could try restoring it from the Recycle Bin, but there’s extra metadata that the project needs to actually use the object, so even doing that won’t work without some elbow grease and know-how.
Git to the rescue
But we have the magic of Git, so we don’t need to stress.
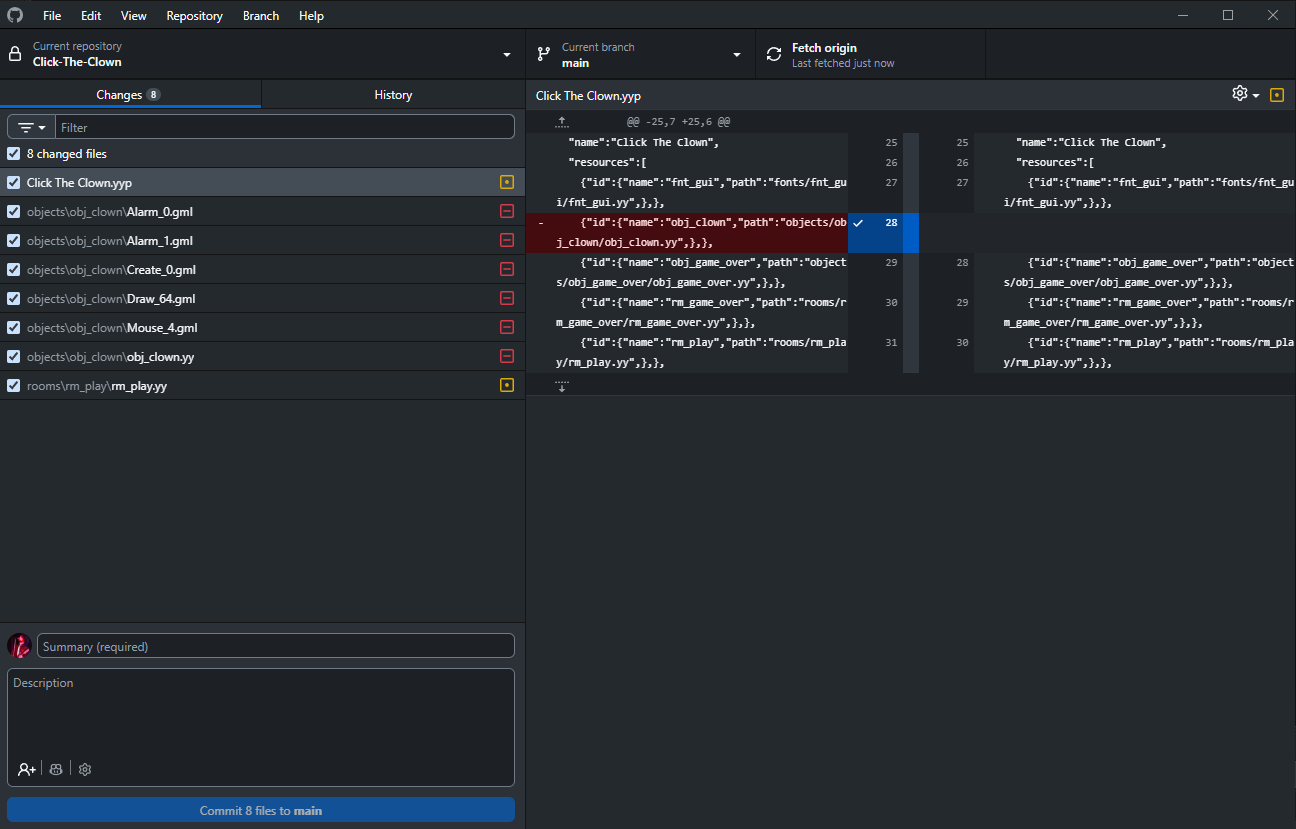
On the left, we can see a number of files have changed.
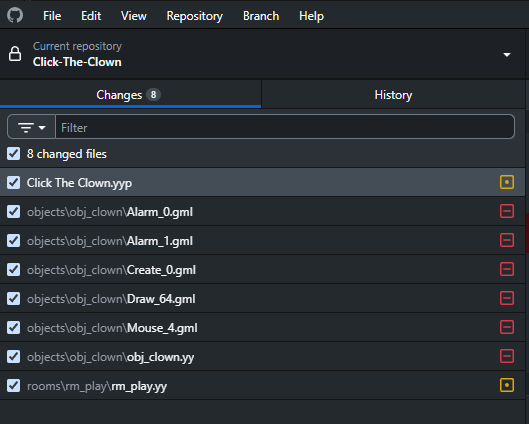
We can see a bunch of objects\obj_clown files, which contain the code for the events (*.gml) and object
file itself (obj_clown.yy). But remember that metadata I just mentioned? We can also see that Click The Clown.yyp has been changed, alongside rooms\rm_play\rm_play.yy, which are the files that also referenced
the obj_clown object, and have been edited to accommodate its removal.
To the right of the file names, we can see some icons.
The yellow icon with a dot ![]() means “this file has been altered”.
means “this file has been altered”.
The red icon with a dash ![]() means “this file has been removed”.
means “this file has been removed”.
There is also a green icon with a plus ![]() which isn’t present here but means “this file has been added”.
which isn’t present here but means “this file has been added”.
So all in all, we can see all the obj_clown files have been removed, and the two other project and room files
have been altered.
Obviously we don’t want these changes. They were a horrible, horrible mistake.
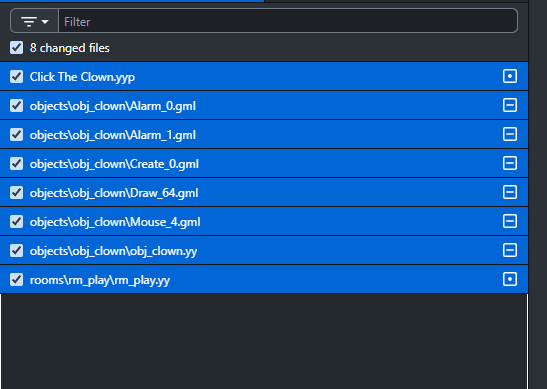
So click on the left-hand side with the files and press Ctrl+A to select all of them.
Now right click on one of them and select Discard 8 selected changes from the context menu.
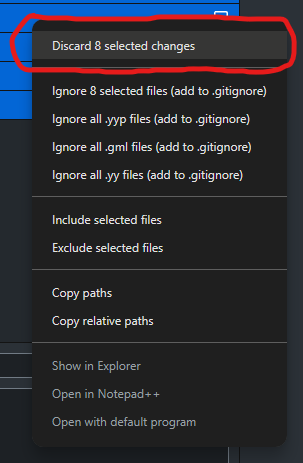
It should pop up with a confirmation dialog box, and click Discard all changes.
Now, if you have Click the Clown open in GM, GM will also pop up with a “Project Modified” dialog box.
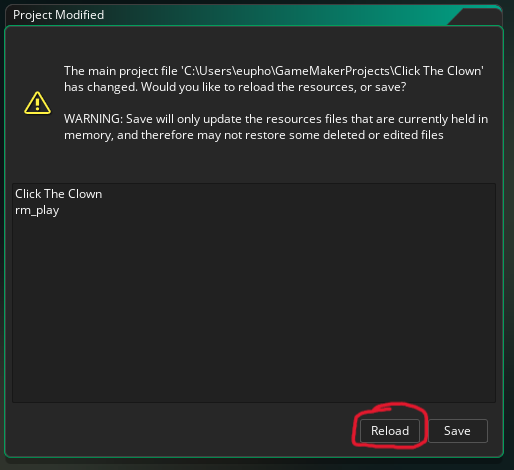
You want to click Reload, not Save. This is because Reload will take the changes currently in the GM project folder, which GitHub Desktop has altered, and mirror them in the actual GM project you have open.
If you click Save, the opposite will happen, GM will save the files in the currently open project and save them into the project folder, essentially erasing the changes GitHub Desktop just reverted for those two files.
It’s important to remember that. Whenever GitHub Desktop makes any changes to something, and your project asks you what to do about the modified project, click Reload.
This only applies to files that were altered, as you can see in the popup, it’s not mentioning any of the
obj_clown files, even though Git has added them back in, that’s because there are no obj_clown files
existing in the open project at this time.
Excellent, you’ve made your first big project error, and managed to easily revert it using Git. What a life saver!
Going back in history
What we just did was revert an uncommitted change.
But what happens if you want to revert a committed change? When you commit a change, all those little files you just selected disappear into the ether! I’ve mentioned multiple times that Git keeps a history of all your commits, so where do you find them?
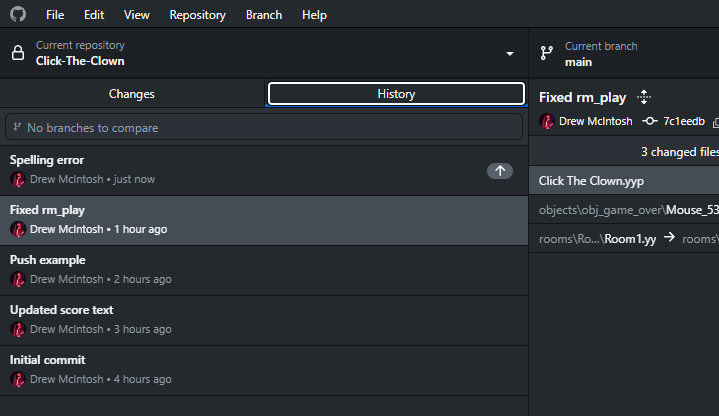
The answer is in the History tab.
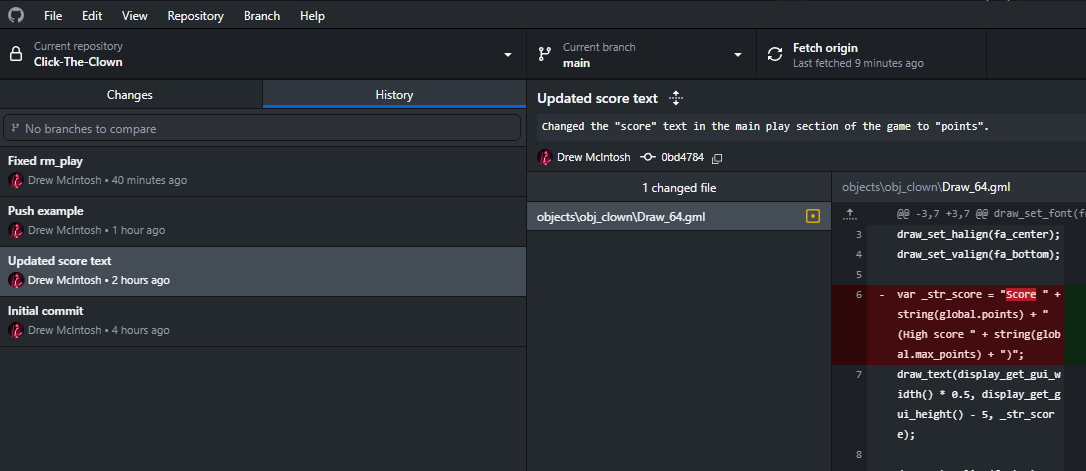
Click it and you’ll find every commit you’ve ever made to Git.
Your commits will likely look a little different to mine, as I’ve made a few extra commits while making this tutorial, but the general idea should be clear.
You have your commit names on the left, and then the files that were altered/deleted/added for the selected commit in the middle, and the actual changes on the right.
If you right click a commit, you’ll get something like this context menu:
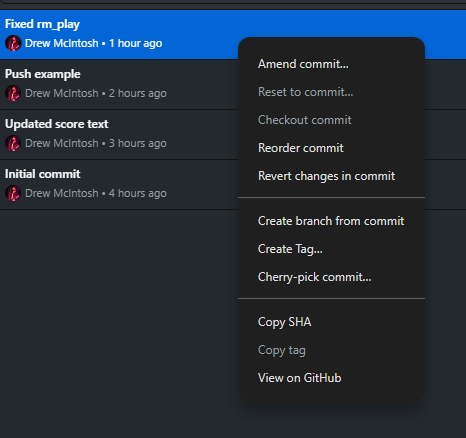
Revert changes in commit is the one you’ll be using the most. This creates a new commit that applies the opposite of the commit you right-clicked.
In simpler terms, Git keeps your history intact, but adds a new commit that cancels out the selected mistake.
Let’s say you have 4 commits, A, B, C and D. You right click on commit C and choose Revert changes in commit.
That means your project will contain any uncommitted changes plus the changes in commits A, B and D.
So if you want to go back several commits, the easiest way to do so in GitHub Desktop is to right click the very top commit (your latest one) and revert that one. Then right click the next one after that one and revert it. Keep going until you reach the commit you are interested in. Don’t revert that commit.
Usually, you’ll only want to revert a single commit, or maybe two at the most.
There are other options you have here, obviously, but for the simple “I want to be able to move back through my history to a prior commit” backup case, this is more than enough.
The same Reload, don’t Save rule applies here too. If GitHub Desktop changes project files while GameMaker has the project open, and GameMaker asks what to do, click Reload.
Let’s make a commit we want to revert.
In GM, go back to the Draw GUI event in your obj_clown object.
Let’s change this line:
var _str_score = "Points " + string(global.points) + " (High score " + string(global.max_points) + ")";To contain a spelling mistake:
var _str_score = "Poinst " + string(global.points) + " (High score " + string(global.max_points) + ")";Points is misspelled as poinst in the second line.
Press Ctrl+S to save the project.
Go back to GitHub Desktop, and click on the Changes tab next to the History tab.
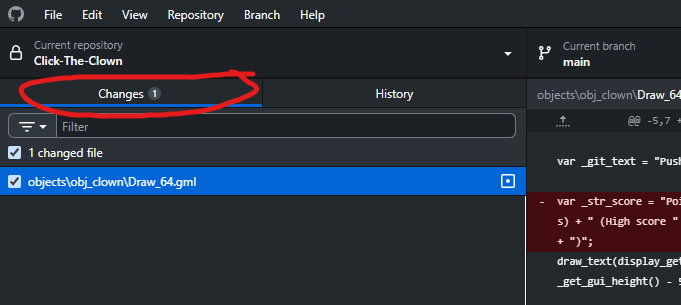
This brings us back to our uncommitted changes window (in fact, you can see that the Changes button already has a little 1 marker on it, meaning there is 1 file that is uncommitted).
Let’s name the commit “Spelling error”. Don’t worry about the description. And hit Commit 1 file to main at the bottom of the window.
We won’t push this to GitHub online, so it will stay a local commit only.
Click on the History tab again and we should see our new commit at the top of the list with the name “Spelling error”.
(The little arrow on the right of it is actually telling us “you haven’t pushed this commit online yet”, but as I said, we won’t do that for this commit).
Right click on it. Our context menu should look something like this:
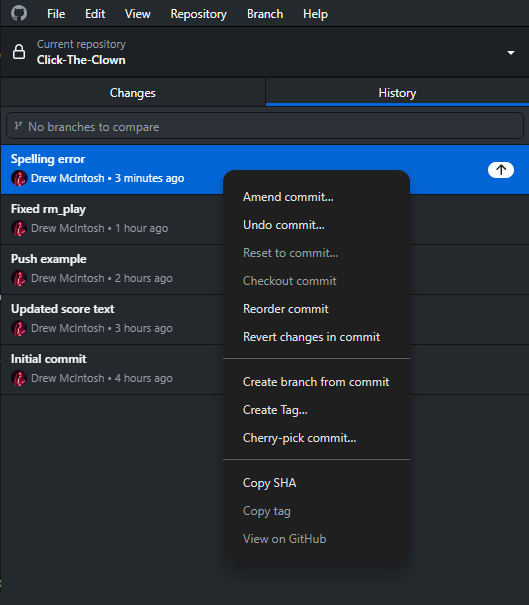
Because this commit has not been pushed online, we’ve actually got two options: Undo commit or Revert changes in commit.
Undo commit will literally just move the changes in the commit back to our uncommitted changes (in the Changes tab) and remove the commit entirely. We can then just discard the changes as we did when we deleted our clown object.
Revert changes in commit behaves a little differently, and because we’ve been talking about it already, and you’ll likely run into the need for it because of habitual pushing online, we’ll focus on that one.
So click Revert changes in commit. A new commit should appear called Revert “Spelling error” commit:
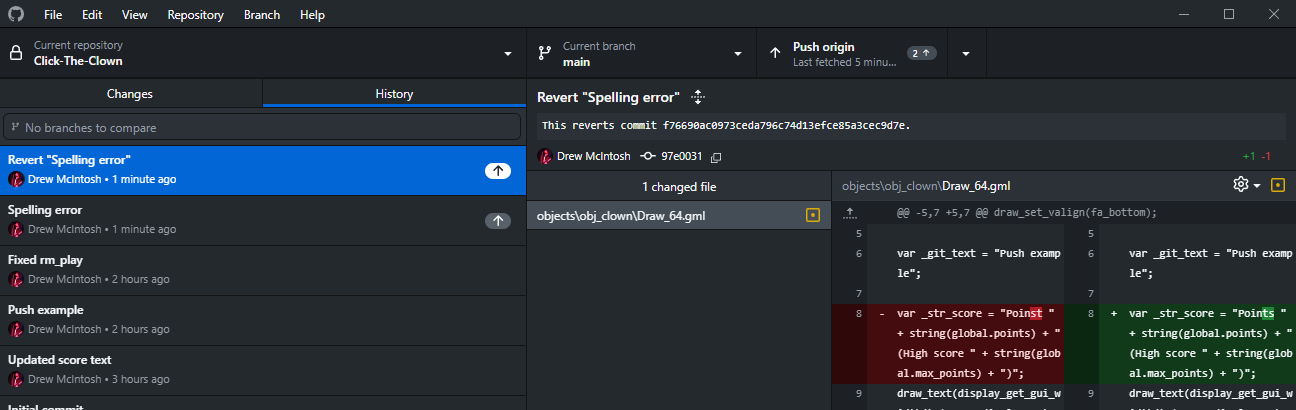
If you select the new commit and look on the right-hand side, where the actual code changes are shown, you can see that “Poinst” is being deleted and “Points” is being added again.
The new commit has given us the project with the exact changes in that one commit reverted.
At this point we know how to revert uncommitted changes, we know how to look through our commit history, we know how to undo commits that haven’t been pushed online and we know how to, step by step, revert commits until we get to a particular one we are interested in.
The next lesson will be about branching our project, so we can do experiments and test things out without having to worry about jumping back through commits to try to get to prior safe places.